Welcome to my Camera Page
Including Viewers
These
pages are copyrighted.
No portion of this site may be reproduced in whole or in part
without written permission of the author.
Other pages about my work
![]()
What’s on This Page?
![]()
Brownie Reflex
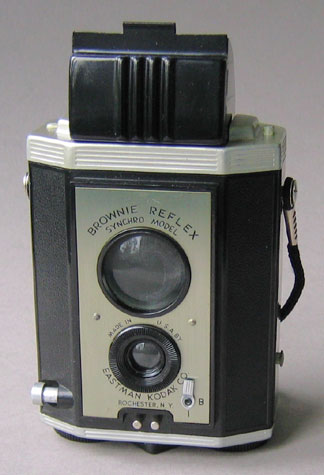
My first camera was a brownie reflex that my parents bought for me in the 1940’s. It used 127 film and the negatives were about 1-1/2” square. I used this for many years, but it was not until 9th grade in high school that I became seriously interested in photography. For a short time I used my father’s 35mm Argus C3 and took black & white pictures. It had a f3.5 lens and was not terribly sharp. I even developed my own film. I was also inspired by a classmate, Mike Walsh, who had an enlarger. I soon purchased a used Elwood 5X7 diffusion enlarger and misc. darkroom equipment.
Argus C4
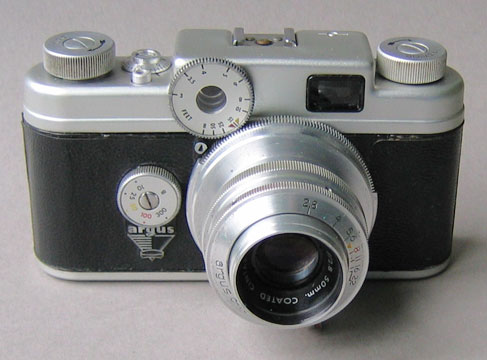
The first camera that I bought was a 35mm Argus C4. It was about $65 at EJ Korvette in White Plains, NY. It had a 50mm f2.8 Cintar lens and was much sharper than the Argus C3. The rangefinder focusing was much easier to use as well. With this camera I took both slides and black & white pictures. I also bought a Weston Master II light meter to make the correct exposures. I experimented with color filters to get different effects in the black & White pictures. I even used infrared film and a dark red filter. Later, I had the camera modified to allow removal of the lens. I bought a 35mm wide angle and 100mm telephoto lends to use with it.
|
|
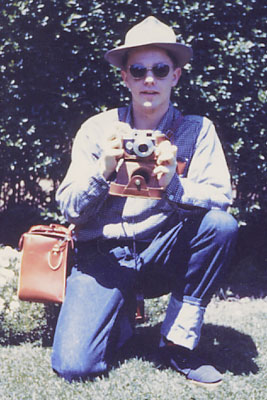
Here I am in the back yard in Scarsdale, NY with my Argus C4. I also had a camera bag with a long strap that I used to carry filters, other lenses and flash.
The picture was taken on an Argus C3 and Kodachrome slide film. The year was about 1953. |
![]()
Rolleiflex
|
|
|
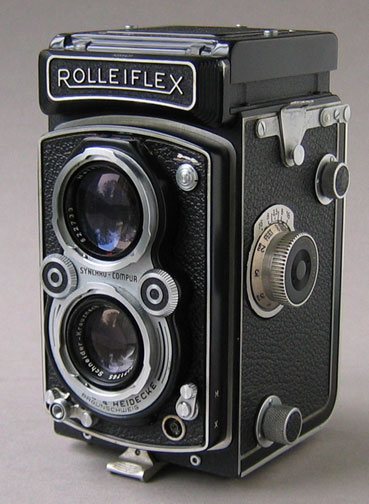
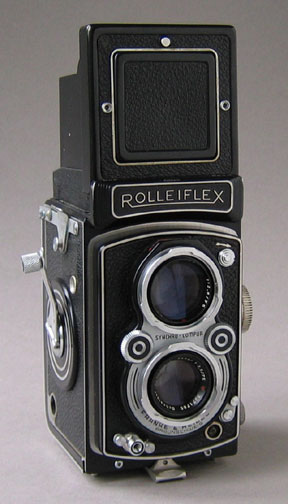
On 2/19/54 I bought my first serious camera. This was a Rolleiflex m/x twin lens reflex and it cost $285. It had an 80mm Schneider xenar f3.5 lens. This was an excellent twin lens reflex camera that was used by press photographers around the world. It takes 120 film and has 2 ¼ X 2 ¼ negatives. Shutter speeds are 1 sec to 1/500th of a second. I used this for many years and took some really excellent black & white pictures. To go with the Rollei I used a Heiland flash gun that took #5 or #25 flash bulbs. 120 color film was expensive at that time and not that good, although it could have been limited by the dynamic range of the printing paper that was available at that time. So I typically would be armed with the Argus C4 for slides and the Rollei for black & white.
![]()
6-inch Reflecting Telescope

In 1962, I made a 6” reflecting telescope. I decided that I would like to do some astro-photography. I bought a mirror that was already ground, silvered and tested. I also bought the tube for the scope and cut and mounted all of the components. In addition, I bought the tripod and equatorial mount. The counterbalance weights can be seen on the near side. A spotting scope is at the upper end.
![]()
Nikon F
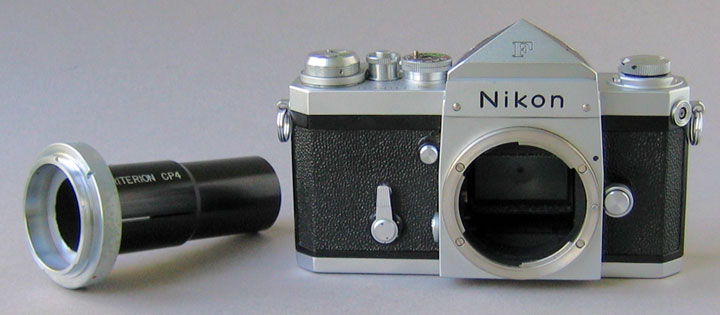
I arranged to purchase a 35 mm Nikon F body through a friend at Sonotone. Edmund Scientific had a Criterion CP4 telescope adapter that would attach to the Nikon body. The long tube fit inside the 1-1/4” eyepiece holder. I sent the camera to Nikon to be modified so the mirror could be manually released. This eliminated the mirror bounce that would jar the telescope. The Nikon F shutter was made of titanium giving very light moving mass and minimum vibration. The self-timer did away with manually pressing the shutter release. I had an extra brass counterweight made to compensate for the added weight of the camera. Later, I decided to begin taking slides again and purchased a 50mm Nikon lens to use with the body. I still used the Weston light meter for all of my photography.
![]()
Nikkormat
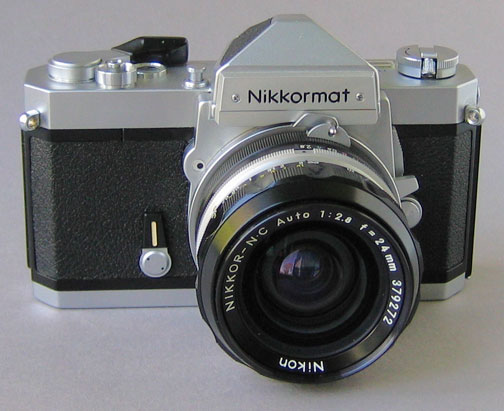
The next camera I bought was a Nikkormat FTN. This has a built-in light meter and was far easier to work with. I gradually accumulated several more lenses including a 24 mm, 35 mm, 105 mm and a 55 mm micro lens. As a result, I purchased a second Nikkormat body and used both cameras with the two most useful lenses. The 24 mm lens was great for creative work. The distortion with close objects was fascinating and made great effects. A battery is needed to run the light meter.

With the Nikons, I purchased a new set of 52 mm filters that would fit all of the new lenses. The most common were Polaroid, yellow, blue, green, red and haze.
![]()
Mamiya C330f
|
|
|
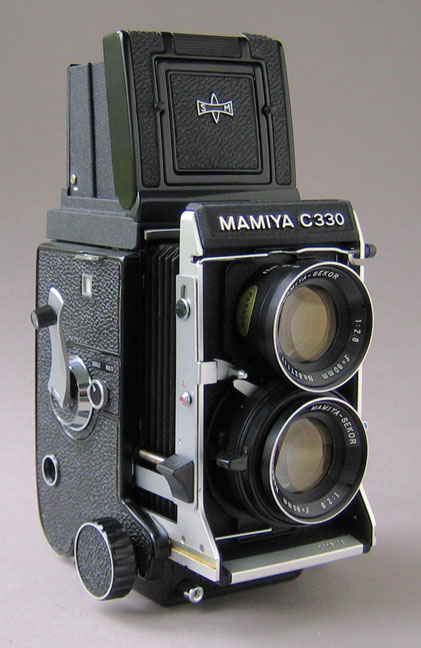
The Mamiya C330f (2 ¼ X 2 ¼) twin lens reflex could be thought of as an improved Rolleiflex and I had to try it. It has interchangeable lenses and an extension bellows that allow close-ups. It also has interchangeable viewscreens and double exposure option. It comes with an 80 mm f2.8 taking lens. I also got a 180 mm lens. However, the camera is larger, heavier and a little more complicated to run than the Rollei. The foam seals in the back do deteriorate over time and allow light leaks. However, replacements are still available. I took many excellent pictures with this camera. I found it very handy with the 180 mm lens and used that more than I had anticipated.
![]()
Hasselblad 500 CM
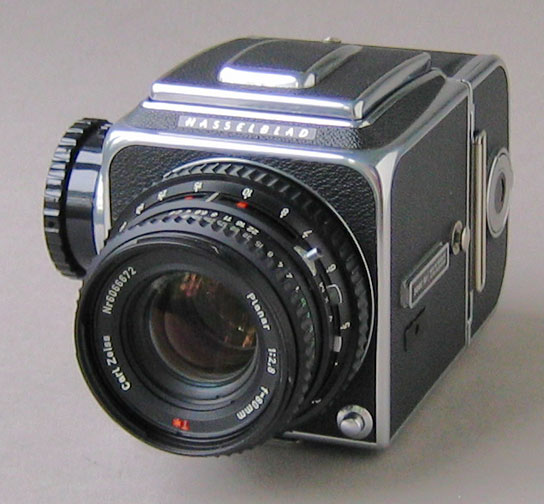
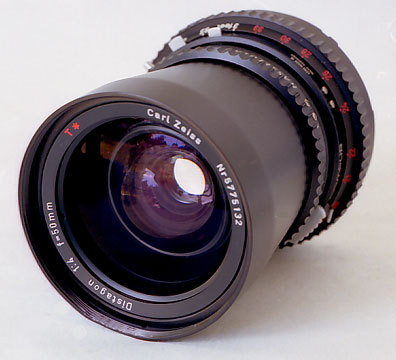
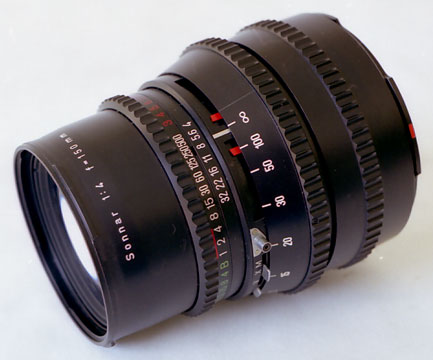
I tried many cameras after the Nikon and Mamiya. I bought a Mamiya 645 (6X9 cm), Graflex Norita (2 ¼ X 2 ¼), Kodak Retina IIIC (35 mm), Minox 3b subminiature and Kowa Super 66 (2 ¼ X 2 ¼). None of these cameras had all the good features and ease of use that I would like to have. Then I bought a near mint Hasselblad 500 CM. It worked so well that I decided to sell some of the other cameras. The Hassy seemed to be used by the professionals most of the time.
|
|
|
I bought a 50 mm wide angle lens (left) and a 150 mm telephoto lens (right) to go with it. It was only after several years, when I used it on a vacation trip that the prints came back showing there had been light leaks. The foam material had deteriorated around the slide in the film backs. I had them replaced but was never sure when they would go bad once again. The Rolleiflex did not require foam seals for the camera back.
![]()
4X5 Monorail
|
|
|
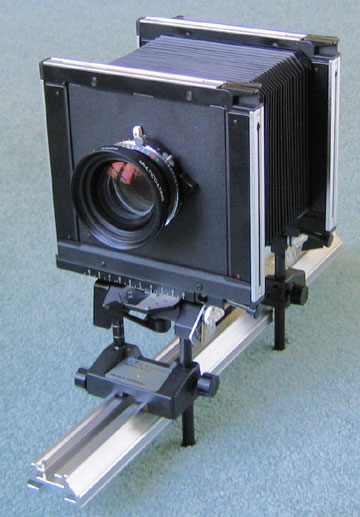
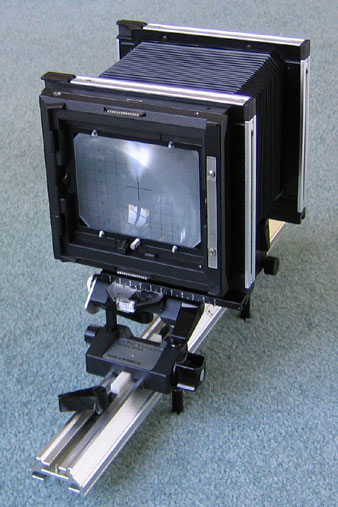
I decided to try a Sinar 4X5 monorail camera from Zone VI Studios in Vermont to move further towards a better negative and even better gray tones. The camera is a Swiss-made Alpina model. I bought a Schneider Symmar 210 mm lens to go with it. There are things you can do with a view camera that cannot be done with an ordinary camera. Most useful for me is the tilting lens board that can give great depth of field. I tried the Zone VI field camera but it was too much of a hassle for me to set up each time. With this monorail camera, I could keep it essentially all set up in its bag and just take it out and mount it on the tripod. Admittedly, this is not for action shots but is great for composed pictures. Viewing and composing must be done with a reversed upside down image on ground glass. A magnifier is necessary to ensure accurate focusing and a fresnel lens is used to eliminate a hot area on the ground glass. Of course, all this must be done with a cloth over your head and camera back so you can see the image on the ground glass.
![]()
Spot Meter
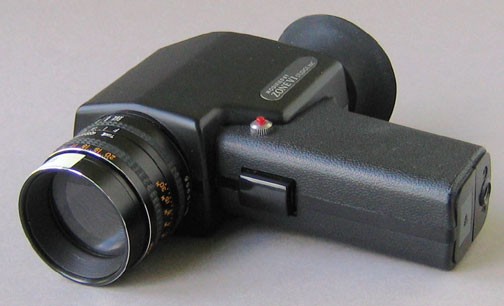
I bought this Soligor spot meter for use with the zone system and mainly with the monorail. By taking a reading of the brightest part of the scene and the darkest part of the scene, you can set the exposure for the part of the scene that is of most interest. However, I found the best way to make an exposure is to take a reading of the brightest area and set the exposure for zoneV and let the rest of the values fall where they may. I later had this meter modified by Zone VI in Vermont, A filter was added to restrict ultra violet light reflected from such objects as green leaves that can give false readings. A 9 volt battery is needed to power it.
Clamp

For times when I was hiking through the woods, this clamp came in handy. After finding a small tree in a suitable location for a good picture, it could be fitted around a trunk as large as 4 or 5 inches in diameter. At the right is an adjustable mount for the camera. I could take long exposure pictures and not have to carry a tripod or I could even include myself in the picture using the camera self-timer.
![]()
Revere Stereo
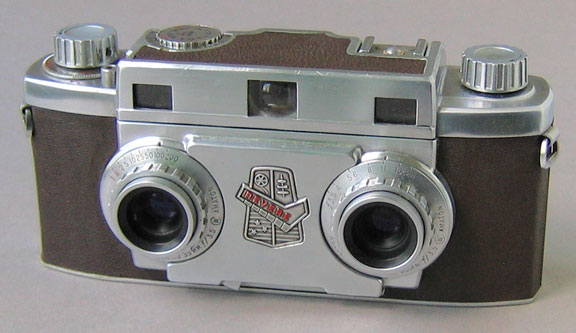
I think the most popular stereo camera in the 1950’s was the Stereo Realist but it was too expensive to afford at that time. It wasn’t until many years later that I found a different stereo camera. This was a Revere 33 and was my best stereo camera.. In the 1970’s, I also had a Kodak stereo that was not as versatile. The stereo cameras had a tiny level that could be seen in the viewfinder. Leveling the camera was very important; otherwise the two images would not complement each other in the vertical direction.

Kodak offered processing and mounting for stereo slides for many years. They would process and mount Kodachrome and Ektachrome film using cardboard mounts similar to ordinary 35 mm slide mounts. By sending in a processing mailer for 36 exposure films, a roll of 20 exposure film from a stereo camera would be processed and mounted. I had to remember to say “stereo mount” on the mailer. Stereo photography was very popular in the 1950’s. However, after many years, Kodak would no longer do the mounting.
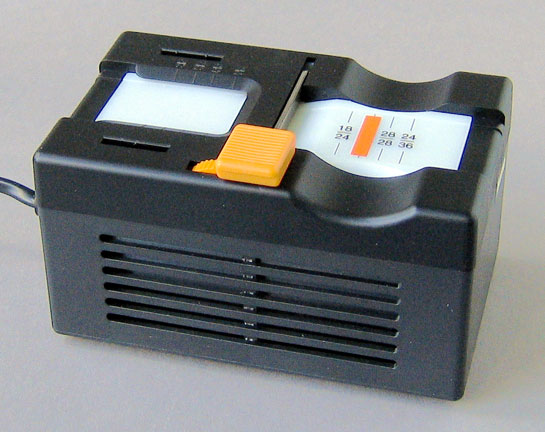
After that, it was up to independent companies to provide the service or furnish the equipment for do-it-yourself enthusiasts. I then purchased a Hama model 1225 film cutter and cardboard mounts to make my own slides. The individual pictures could be gut in the right place with a small cutter bar. I had to be sure to get the correct picture in the correct frame. Otherwise, when viewed, the picture would appear strange looking.
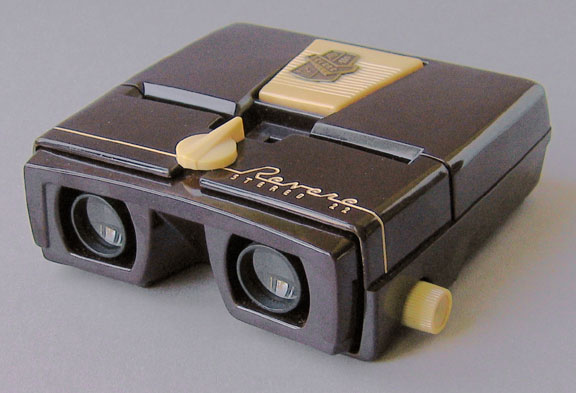
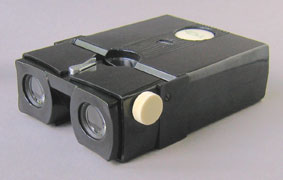
Hand held stereo viewers with a light were available. This is the Revere 22 slide viewer. The two frames are illuminated by a single lamp in the center. It is powered by two D size batteries. After inserting the stereo slide in the center slot, the beige button at the back could be pushed to turn the lamp on. The knob on the side moved the lenses back and forth for focusing. The center lever could be turned right or left to adjust for astigmatism. The viewer body appears to be made of Bakelite.
|
|
|
|
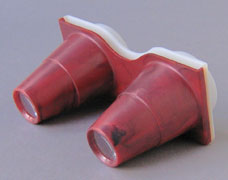
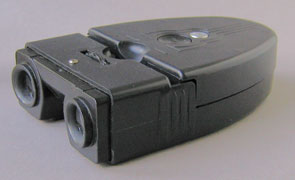
Other viewers are the Stereo Realist model 2064 battery operated viewer (left), Bamberger model 1265 battery operated viewer (right) and a non-illuminated viewer that must be held up to the light (center).
I had also bought a Viewmaster camera that took tiny stereo pictures that could be mounted in the round Viewmaster slide holders. I also found a Viewmaster projector that used the cross polarized system to view the slides.
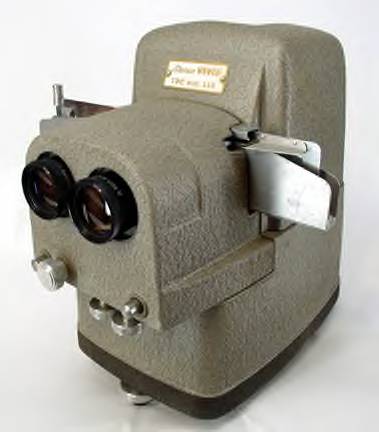
Besides viewers, there were also stereo projectors. I found a 300 watt TDC projector. Slides were changed manually. It used the cross polarized projection system and complementary glasses were needed to view the slides. One lens is polarized vertically and the other is polarized horizontally. When wearing the corresponding glasses, the vertically polarized picture could only be seen with the vertically polarized lens in the glasses. The horizontally polarized image for the other eye was blocked by the vertical polarization. This way, each eye saw a different picture. This same polarization system is currently used at Disney and other attraction parks for very realistic effects. A silvered projection screen was needed for best results.
![]()
The Stereo Opticon
![]()
In the late 1800’s and early 1900’s when photography began, stereo was also introduced. Prints from a double-lens camera were mounted on thick cards. The viewer had two lenses and a sliding card holder that could be moved forward and back to focus. The hooded portion was held up to the eyes and blocked extraneous light from entering. A handle underneath could be folded down to hold the viewer.
![]()
The cards measured 3-1/2 inches by 7 inches. Hundreds and hundreds of these were produced on a variety of subjects and in world-wide locations. Some cards were colored by hand. Others were translucent and could be held up to the light for viewing. Some of the cards in this picture are dated 1904.
![]()
After many years of using all of these and several other cameras in many different situations, I have concluded that the Rolleiflex is the best and most versatile camera of them all. I could always rely on it. Not only that, but after 50 years, the camera is still working perfectly with no repairs ever needed. I have recently used it for color vacation pictures and they came out excellent. I didn’t even need a light meter.
It is inevitable that the digital camera will gradually replace all of the film cameras, amateur and professional. In addition, the amount of time and effort to produce a good print can also be reduced. The darkroom can be literally eliminated along with mixing all the chemicals, critical temperature controls and film and print washing. Oh yes, and working in the dark or with a safelight. I became very proficient at loading the Nikkor stainless steel developing tanks and the 4X5 sheet film. I haven’t given them up yet but I expect it is only a matter of time and convenience. Photo enlargers will also be a thing of the past. Even today, I am scanning the best of my collection of 6000 negatives and slides. I crop and spot and adjust with such ease. It would take hours of trial and error to come up with anything as good in the darkroom.
The down side of digital cameras is the need for a battery. The special lithium rechargeable ones seem to be constantly in need of a charge, despite claims by the manufacturer and they don’t hold much charge when not used. They need to be replaced after a while as they deteriorate with use and they are not cheap. Two are needed so you have a spare. Otherwise, you are out of business. A camera using relatively inexpensive and easily purchased AA alkaline cells is much more reliable.
|
About This Site |
|
|
More text and pictures will be added to these pages as time permits. Any comments are welcome. |
|
|
Email
to |
Created
by Roger Russell |
